Friday, January 25, 2013

Ozarks Gardening Made Easy with Raised Beds! (How-To)

Materials for a raised garden bed
  • One 6-foot-long 4-by-4 ($15) (Cedar or Redwood is best for rot resistance & Aesthetics)
  • Six 8-foot-long 2-by-6s ($75) (Cedar or Redwood is best for rot resistance & Aesthetics)
  • 32 3½-inch #14 wood screws and 16 ½-inch #8 wood screws ($29)
  • One 4- by 10-foot roll of ¼-inch-mesh hardware cloth ($15)
  • 32 cubic feet (1 1/5 cu. yd.) planting mix ($25 in bulk or $100 in bags)

 Everyone in the Ozarks knows that when you're out to garden you best get ready to do a lot of "rock" gardening, because our earth is so rough & tumble full of clay, rock and sand that it's hard to get good crops out of it unless you take years or many dollars worth of top soil, manure and compost to get it worth planting in. (Not counting tomatoes which seem to love our soil type & as does our native flora).

The above materials should be enough to create one raised bed  (see our previous blog post on how to make an insulated raised garden bed.)


With a table or power saw, cut the 4-by-4 into four 16-inch-tall corner posts. Cut two of the 2-by-6s in half. Cut the 1-inch PVC pipe into four 12-inch-long pieces and the ½-inch PVC pipes into 6-foot-long pieces. Assemble pieces on a hard, flat surface by nailing/drilling the 2-by-6's and their halves to the four corner posts you cut to make a approx. 8 ft long box. After marking off an area and placing the box where you want it to be in your garden, place the cloth (or chicken wire) on the ground to keep out moles, then fill the bed with a good healthy mix of soil (home mixes that are comprised of compost such as manure, leaves, veggie/fruit leavings are excellent- Goat, Rabbit, Horse & Donkey manure are great for this.) to where it's just about 1-1.5" from the top of the boards. You should be able to get about 6 rows of leaf lettuce out of each box, but the needs of each crop you intend to plant will vary in spacing requirements for a good healthy harvest. (Allot space for poles or supports for beans, tomatoes, etc).

Click Here For a Visual Step-By-Step on how to assemble a raised bed.

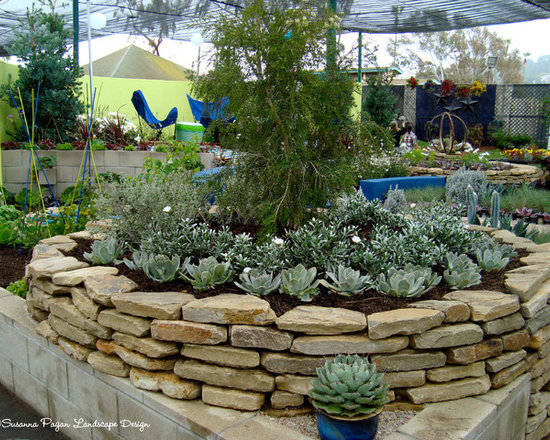
Some design ideas we found online: (good to doodle these out during Winter to help get organized for Spring!)

Remember, if you want a custom and different design your materials will change compared to what we've shown above, so allot for the changes for your own design.


Monday, January 21, 2013

Getting the Garden ready for Spring planting without using Gas, Electricity or Oil powered machines. Off-Grid Goodness!


  While browsing online, I found a good source of tips and information that will help those off-grid or living the "simple life" to save some money and get the garden ready for Spring planting that's just a few months away.

"Once you have the grass mowed and the weeds chopped down, the next step is to break up the soil for planting. Heavy duty tools like a Broadfork can make this job easier. The 20 inch wide fork is specially sharpened to take big bites from the ground. Extra-long 60 inch handles give you lots of leverage to break the soil loose. There’s much less bending over than a hoe requires, and no need to chop or hack at the soil. Best of all, the dirt is left loose and pliable, not packed down by heavy power equipment.

Once the soil is broken up, the next step is to cultivate. Instead of using a bulky gas-powered tiller to over work your soil, you can create a smooth planting bed with an easy-to-use rotary cultivator. To use this tool, you simply push it in front of you as you walk down the rows of your garden. The wheel breaks up the soil and works in your peat moss or compost while you get some exercise.

Once your garden is cultivated, it’s time to plant. To keep your rows nice and straight, just drive a one-foot stake at the end of each row and tie a string between them. Then use the string as a guideline.

Dreading the thought of crawling around on your hands and knees to plant all those seeds? No need if you get yourself an old fashioned corn planter. All you have to do is pour the seeds into the cup on the side, push the steel blade into the ground and squeeze the handles. The seeds will drop right where you want them. It’s a very efficient system and allows you to finish a chore that could take hours in just minutes.

If you want butterflies decorating your garden, once you have the seeds in the ground, plant oregano, borage, catnip and hollyhocks between the rows. The colors and scent attract the beautiful creatures. Butterflies also like bee balm, red carnations and begonias.

After planting your garden the natural way, don’t stop there. Make a pledge to water your vegetable plants by hand every day with a good old-fashioned watering can. And instead of relying on pesticides -- which over time can work their way into the ground-water and damage the environment -- to keep the weeds down, get out there every day with a hoe and pull them up.

To keep bugs away, sprinkle a mixture of garlic power and flour on your plants. It works especially well for cabbage flies, but use it sparingly. The mix will get pasty on the leaves if applied too thickly.


( picture gained from here )


OLD TIME GARDEN TIPS
Here’s a trick to keep the woodchucks from stealing carrots from your garden. Fill glass gallon jugs with water and place them around your garden. The woodchucks see their reflections and, apparently thinking it’s another animal, run away. Sounds silly but it works.

If you’d like to force hornets, bees and wasps to move out, try hanging moth cakes on your deck, under the eaves, or anywhere else they like to build their nests. They don’t like the smell so they fly far away and call somewhere else home. "

Article taken from this site.